Visible Mending Techniques: Modern Sashiko Applications
- Aug 12, 2025
- 15 min read
Updated: Aug 25, 2025
Key Takeaway: Transform clothing repairs into personal creative expression using sashiko-inspired visible mending patterns that add years of life to your favorite garments.
What You'll Learn: • My tested approach for selecting visible mending patterns for different modern fabrics • How to use sashiko designs in contemporary clothing repair • Time-saving preparation methods I've learned and developed for efficient mending stitches
Bottom Line: Visible mending can draw from both traditional techniques like sashiko and your own unique ways with needle and thread to create deeply satisfying, functional repairs that tell your garment's unique story while reducing textile waste.
Table of Contents
Understanding Sashiko and Visible Mending: Clearing the Confusion
My Approach to Visible Mending Patterns
Choosing Sashiko Designs for Modern Wardrobes
Color Stories: Creating Cohesive Repairs
Working with Modern Fabrics: My Adaptation Techniques
Building Your Mending Practice: Routine and Rhythm
Troubleshooting Modern Mending Stitches
Frequently Asked Questions
Key Takeaways
That moment when you complete your first visible mending project - when damaged fabric transforms into something unexpectedly more beautiful or interesting under your own hands - can change how you see nearly every piece of clothing you own.
For me, it all started with a punk jacket in junior high school. My old Mickey Mouse sweatshirt was tattered to shreds, chewed on by my dog, Joe, and a little too tight around the chest. My solution? Cut old Mickey out of the foregone shirt, then reuse him as a backpatch - right along side patches from bands like the Dead Kennedys and Ramones. I stitched raggedly with Frankenstein's monster-looking hand sewing, bolstered by at least two dozen safety pins. Was it beautiful? No. But it was all mine.
The contemporary practice of visible mending draws wisdom from traditional techniques like Japanese sashiko while adapting to modern lifestyles, fabrics, and personal expression. Unlike our grandparents' invisible darning (which bored me practically to tears as a teenager), today's visible mending celebrates the act of repair as a creative choice and environmental statement.
In this guide, I'll share some practical applications I've developed for contemporary wardrobes, from technical wear to vintage finds. For those interested in the traditional foundations and cultural context of these techniques, I encourage you to explore our comprehensive guide to boro and sashiko differences for essential cultural background.
Let me show you how I'm making visible mending a sustainable, satisfying part of my clothing care routine.
Understanding Sashiko and Visible Mending: Clearing the Confusion
One of the most common questions I hear is: "Is sashiko visible mending?" The answer requires understanding these as related but distinct practices, and I've found this distinction crucial for choosing the right approach for each repair.
Sashiko is a specific Japanese stitching tradition using running stitches, often in striking geometric patterns. It developed as a functional technique for reinforcing and repairing textiles when materials and money were scarce. It's recognizable for its distinct use of white cotton thread on indigo fabric. When I practice traditional sashiko, I'm following established patterns and techniques passed down through generations of Japanese families and craftspeople.
Visible mending is the broader contemporary movement that celebrates repairs as design features rather than hiding them. It draws inspiration from many traditions—Japanese sashiko, Indian kantha, British darning, and many others. When I practice visible mending, I might use certain sashiko mending techniques, but I'm also adapting them freely for modern needs and creative expression.
Here's how I think about it: All sashiko can be visible mending (when used for repairs and in the traditional way), but not all visible mending is sashiko. When I use sashiko designs in my visible mending, I'm applying traditional patterns to contemporary repair needs. This distinction helps me choose techniques thoughtfully rather than assuming one approach fits every situation.
Why This Matters for Your Practice
Understanding this relationship has transformed how I approach repairs. When working on a beloved vintage jacket, or haori, I might use traditional sashiko mending for authenticity. But for my modern wear, I might freely adapt visible mending patterns that incorporate sashiko-inspired elements or boro patchwork alongside other techniques and random, punk or streetstyle inspiration.
I've found that respecting sashiko as a specifically Japanese tradition while embracing visible mending as a creative practice gives me both structure and freedom. I can honor the cultural origins of these beautiful mending stitches while adapting some of the techniques to solve modern fabric problems.
My Approach to Visible Mending Patterns
Over years of mending, crafters develop their own strategies for choosing visible mending patterns that enhance rather than overwhelm garments. Let me share some of the approaches that can consistently yield satisfying results.
The Minimalist Method: A Go-To for Professional or Formal Wear
For professional or formal wardrobes, I recommend tonal visible mending patterns that add subtle texture. Choose threads one or two shades different from the fabric; this creates repairs that whisper sophistication rather than shout for attention.
My favorite technique involves following the garment's existing construction lines with simple running stitches. On a charcoal suit jacket, you might use dark gray thread along the seam lines, creating an almost architectural effect. These mending stitches become part of the garment's structure rather than an obvious addition.
I suggest starting with basic grid patterns for minimalist mending. The repetitive nature of sashiko designs creates a meditative rhythm while producing consistently elegant results. A simple cross-hatch over a worn elbow or thinning knee adds years of life without compromising professional appearance.
The Contrast Approach: Making Statements with Mending
When I want repairs to become design features, I embrace bold contrast in my visible mending patterns. This approach has transformed some of my most damaged pieces into my most all-time favorite garments (hey, Mickey).

I've discovered that successful contrast mending requires confidence in color choice. My rule of thumb: choose thread colors that appear elsewhere in your wardrobe. This creates visual connections across your clothing, making bold repairs feel intentional rather than random. It also helps you hone your unique personal style with outfits you create instead of pluck from an influencer's Reel.
White or cream thread on dark indigo fabrics can create classic contrast reminiscent of traditional sashiko visible mending. But I also love unexpected combinations! Rose gold on olive creates warmth, mustard on navy adds vintage charm, and coral on gray brings unexpected life. Better yet, go with a variegated thread or mix and match multiple colors for a colorfully chaotic look.
The Narrative Method: Developing Your Signature Style
I've developed what I call "color stories" across my wardrobe—consistent thread choices that create visual connections between garments. I often use indigo thread for stress-point reinforcement, red or variegated thread for decorative elements, and cream or white for structural repairs.
This approach to visible mending patterns creates a signature style. Friends can recognize my mended pieces immediately, and I love how this consistency makes my entire wardrobe feel cohesive despite containing vastly different garments.
Choosing Sashiko Designs for Modern Wardrobes
Let me share how I adapt traditional sashiko designs for contemporary clothing, creating visible mending that honors tradition while serving modern needs.
Grid Patterns for Structure
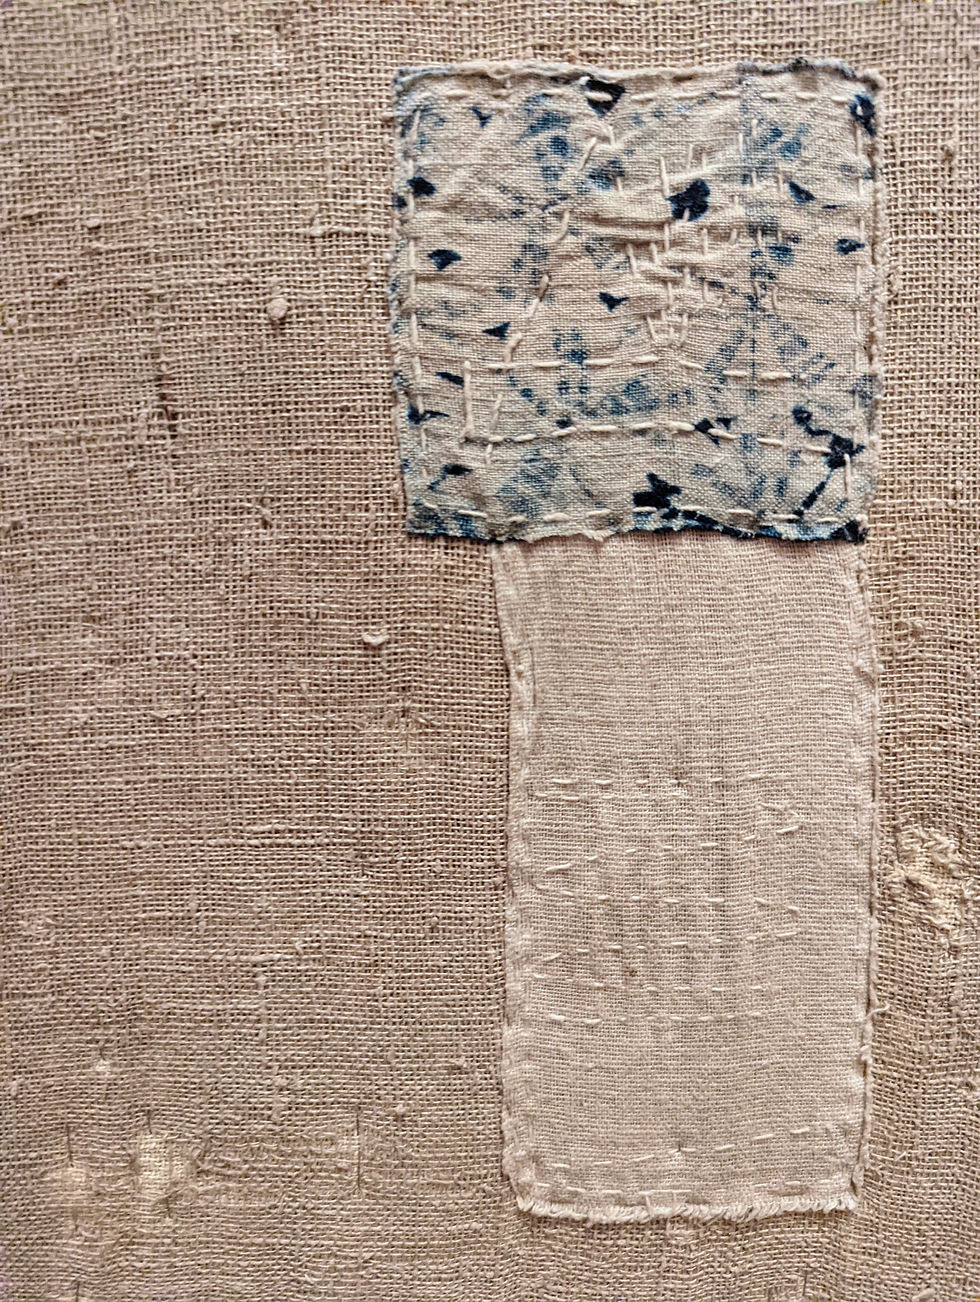
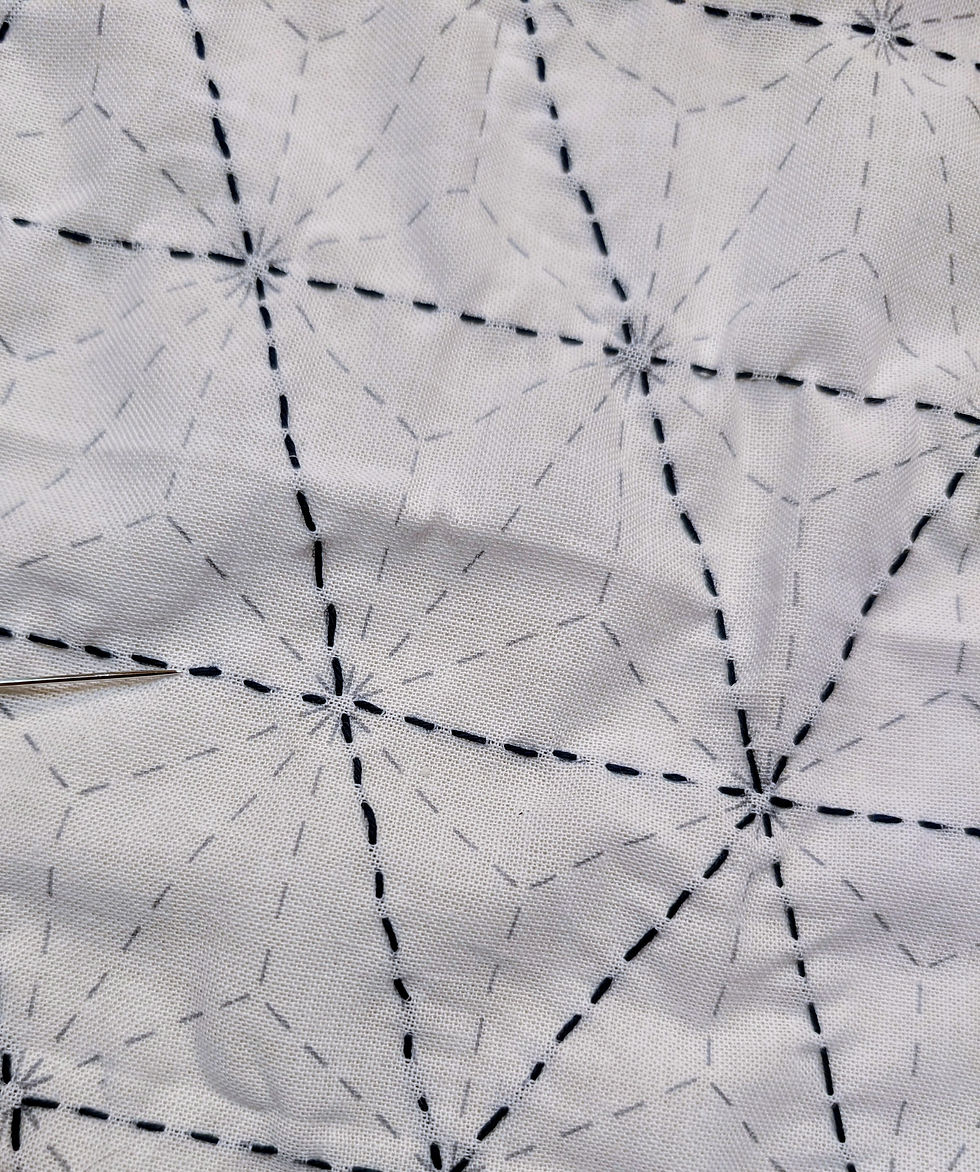
I find grid-based sashiko mending incredibly versatile for contemporary repairs. These patterns—whether simple cross-hatching or complex geometric arrangements—provide excellent reinforcement while looking intentionally decorative.
My approach: I use tighter grids (4mm spacing) for high-stress areas like knees and elbows, and wider spacing (8-10mm) for decorative reinforcement. This variation in visible mending patterns creates visual interest while providing appropriate support for different wear patterns.
I particularly love how grid patterns work on modern technical fabrics. The geometric nature complements the clean lines of contemporary clothing while the mending stitches provide genuine structural reinforcement.
Organic Patterns for Flow
For garments with movement—flowing skirts, soft shirts, drapey jackets—I adapt curved sashiko designs. Wave patterns, grass motifs, and circular designs move with the fabric rather than imposing rigid structure.
I've learned to modify traditional patterns for modern fabrics. Where traditional sashiko visible mending might use consistent 6mm stitches, I vary my stitch length based on fabric weight and stretch (and what I have on hand). This adaptation maintains the visual appeal of sashiko-inspired designs while ensuring repairs function properly on contemporary textiles.
Creating Pattern Combinations
My favorite visible mending projects combine multiple patterns strategically. I might use a grid pattern for structural reinforcement, then add decorative curved elements around the edges. This layering of sashiko mending techniques creates depth and visual interest.
I suggest starting with one dominant pattern and adding secondary elements sparingly. Too many competing visible mending patterns can overwhelm a garment. I've learned this through experience—my early attempts at complex combinations often looked more thrown together than intentional. But if maximalism is the look you're going for, you do you, boo!
Color Stories: Creating Cohesive Repairs
Through years of visible mending, you'll find yourself creating color strategies that can transform random repairs into intentional design choices. Let me share what I've learned about selecting threads for sashiko mending.
Building Your Palette
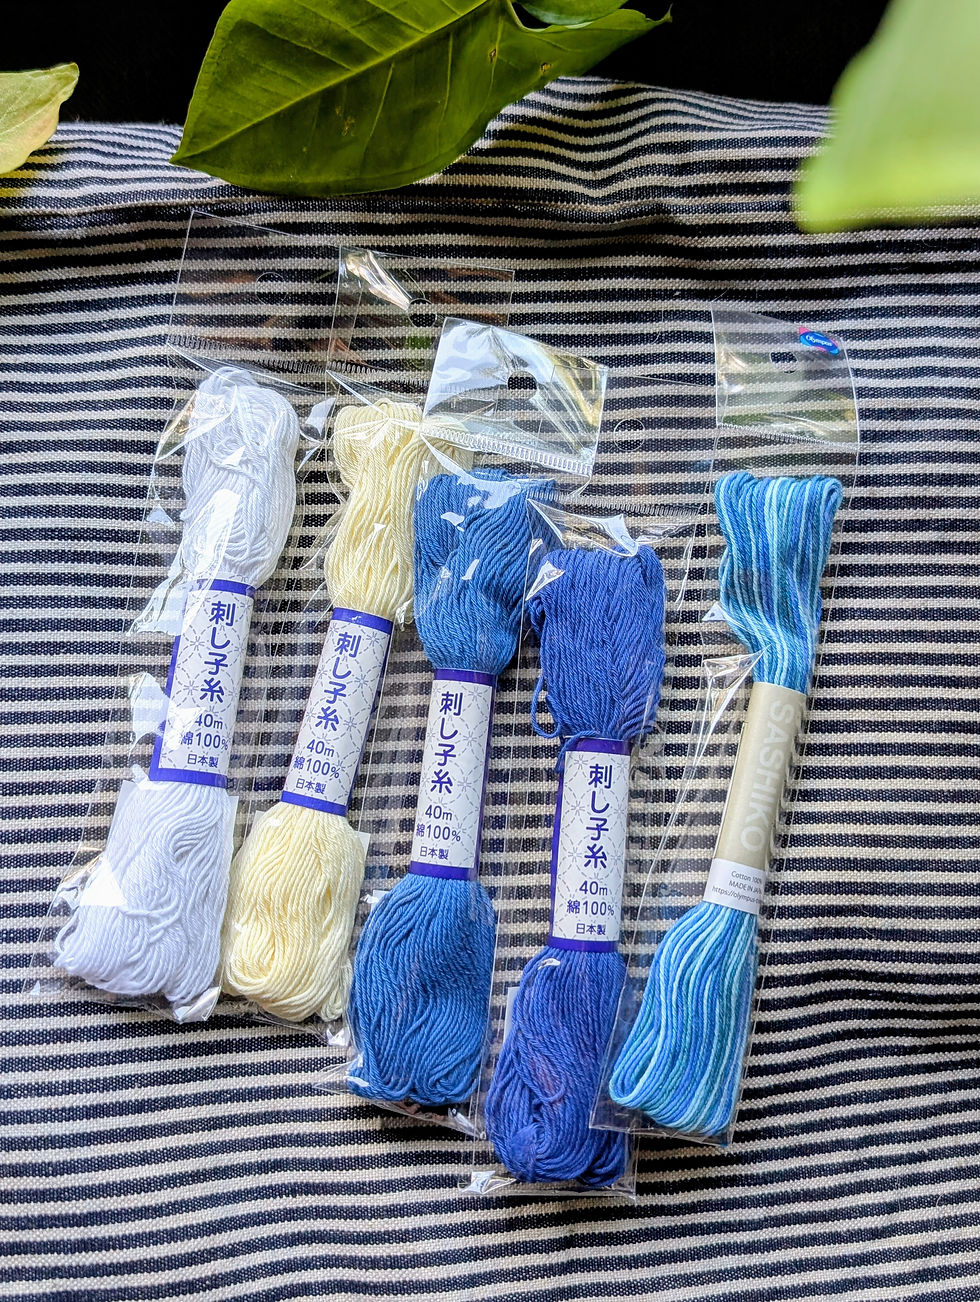
I recommend starting by analyzing your wardrobe's existing color story. Lay out your most-worn pieces and identify recurring colors. My wardrobe clusters around indigo, navy, black, and random pops of color and pattern, so I've built my mending supplies accordingly.
I keep a core mending palette that consists of about three-four thread colors that work across most of my garments. This focused approach means I can start mending stitches immediately rather than agonizing over color choices. My core includes: natural white, off-white or cream, and varying shades of indigo blue. I also like to have red on hand for a more expressive touch.
For visible mending patterns to feel cohesive, I use colors that appear at least once per typical outfit. This creates visual echoes that make repairs feel planned rather than reactive.
Seasonal Considerations
I've noticed that sashiko-inspired designs can naturally shift with the seasons. Summer repairs embrace lighter threads and more open patterns, while winter mending uses denser stitches and richer colors. This organic variation adds subtle seasonal character to year-round garments.
You may wish to maintain two thread collections: warm weather (like coral, sky blue, sage) and cool weather (burgundy, forest green, charcoal). This division can help you choose appropriate colors quickly while ensuring your repairs complement seasonal wardrobe changes.
Testing and Documentation
Before committing to any visible mending, I always test thread colors in different lights. What looks perfect under my lamp might clash terribly or underwhelm the eye in natural daylight. I lay thread across the fabric and check it by windows, under room lights, and in typical wearing conditions.
I like to photograph successful color combinations for future reference or jot notes down. Keeping a visual library or journal of mending can become another layer of your hobby. When you find a winning combination for sashiko / visible mending and document it for future projects (or just because), it helps you reinforce what you've created as an extension of who you are.
Working with Modern Fabrics: My Adaptation Techniques
Contemporary clothing requires adapting traditional sashiko mending for fabrics that didn't exist when or where these techniques were developed. Here are some tested solutions for modern textiles.
Stretch Fabrics and Athletic Wear
Modern wardrobes include numerous stretch fabrics that challenge traditional mending stitches. I've developed specific approaches for maintaining some stretch while creating durable repairs.
For athletic wear, I use what I call directional visible mending patterns, or stitches that follow the fabric's stretch direction. On yoga pants, you can create vertical lines that stretch with the fabric. On fitted t-shirts, use diagonal sashiko-inspired patterns that accommodate multidirectional stretch.
My rule for stretch fabrics: never pull the thread tight. And its a rule I still struggle to follow, if I'm being totally honest! Try to work with the fabric relaxed and leave a slight slack in your mending stitches. It takes some practice and trial and error to find the right amount of slack, but it prevents puckering and maintains the garment's stretch properties. Your repairs might look slightly loose when flat, but they should form to your body again when worn.
Synthetic and Technical Fabrics
I've learned that visible mending on synthetic fabrics requires different tools and techniques from traditional mending techniques like sashiko. Sharp, fine needles designed for synthetics pierce cleanly without creating runs. But you may find yourself replacing these needles more frequently as synthetic fabrics dull them quickly.
For waterproof or moisture-wicking fabrics, consider function alongside aesthetics. You may want to use synthetic threads that won't absorb moisture differently than the base fabric. Visible mending patterns on technical wear tend toward the minimal when at their best: think small, strategic repairs that maintain the garment's performance features.
Lightweight and Delicate Materials
Delicate fabrics intimidated me initially, but I've learned techniques that make visible mending possible even on silk and lightweight cotton. I use single strands of embroidery floss and create smaller mending stitches, about 3mm rather than the traditional 6mm.
It's always best to stabilize delicate fabrics during repair. My favorite method uses tissue paper basted to the reverse side, which is easily removed after completing the sashiko-inspired designs. This prevents distortion while allowing you to create beautiful, delicate visible mending patterns.
Building Your Mending Practice: Routine and Rhythm
After years of sporadic mending followed by overwhelming repair piles, I've learned that consistency transforms visible mending from chore to pleasure. I'm not always consistent because hey, life happens, but I have some great ideas on how to try! Here's how you and I can build more sustainable mending rhythms.
A Weekly Mending Ritual
Dedicate a regular day or time of day to mending. Just a few minutes with coffee and good light is all it takes. This regular appointment prevents damage from worsening and makes mending feel like self-care rather than crisis management.
Keep a basket by your washing machine where family members can place items needing repair. This visual cue serves to remind of what needs attention while preventing damaged items from returning to regular wear. When your date with needle and thread comes up on the calendar, simply grab the basket and begin.
My suggestion: start with just 15 minutes once weekly. This small commitment feels manageable and often extends naturally once you begin. The key is consistency. Regular short sessions accomplish more than sporadic marathons. Just like working out.
Creating Your Mending Space
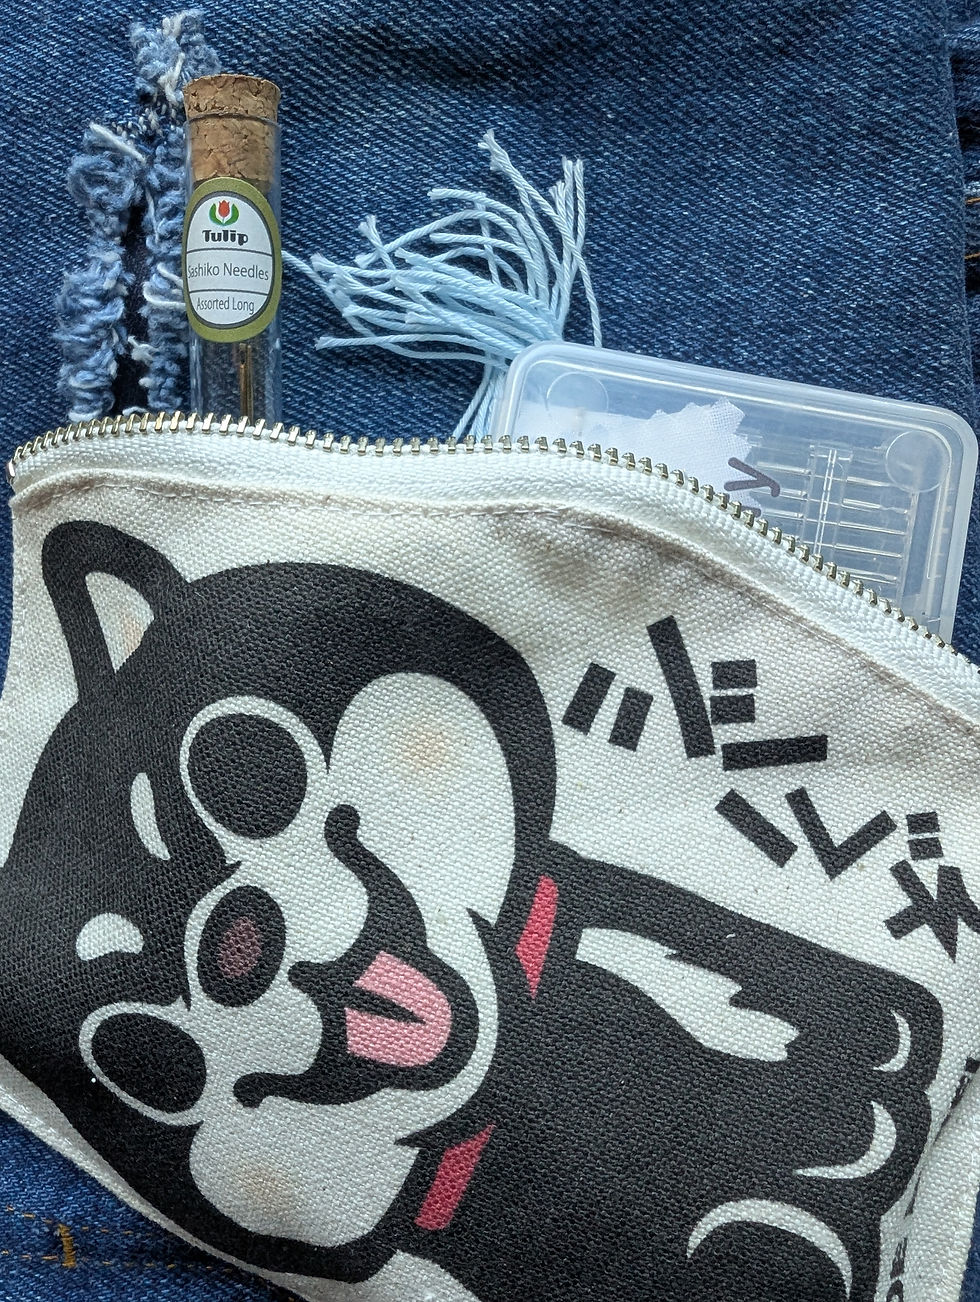
I've learned that accessible supplies make all the difference between mending and procrastinating. I keep a small, portable kit with essential tools for sashiko visible mending that I can take with me as I frequently travel to and from Japan and the US: needles, my core thread colors, small scissors, and a thimble.
Good lighting will also transform your practice. If you can, invest in a daylight LED lamp that shows true colors and reduces eye strain. This single upgrade can make evening mending sessions possible and enjoyable.
I suggest creating a comfortable setup wherever you naturally relax. I mend while listening to podcasts or just sitting outside enjoying the sun. I've also been known to tote my sashiko kit with me to breweries. The association between mending stitches and relaxation makes me look forward to repair time.
Batch Processing for Efficiency
I've discovered that grouping similar repairs streamlines my visible mending patterns work. I'll dedicate one session to all vintage Japanese garments, another to knee repairs across multiple pairs of jeans. This approach minimizes thread changes and helps me develop a rhythm.
Before sitting down to mend, prepare everything: wash items, trim loose threads, and mark repair areas. This preparation means your actual mending time focuses on the satisfying work of creating artful repairs rather than logistics.
Troubleshooting Modern Mending Stitches
Through countless repairs, you'll encounter challenges we all face with contemporary sashiko and mending. Here are some solutions for common issues.
Working with Previous Repairs
Many garments come with existing repairs—iron-on patches, fabric glue, or previous mending stitches. Rather than removing old repairs, I try to incorporate them into new visible mending patterns.
I often outline iron-on or previously sewn-on patches with decorative sashiko designs, transforming obvious patches into intentional features. Previous darning becomes the foundation for new layers of visible mending. This approach honors attempts at preservation while creating cohesive repairs.
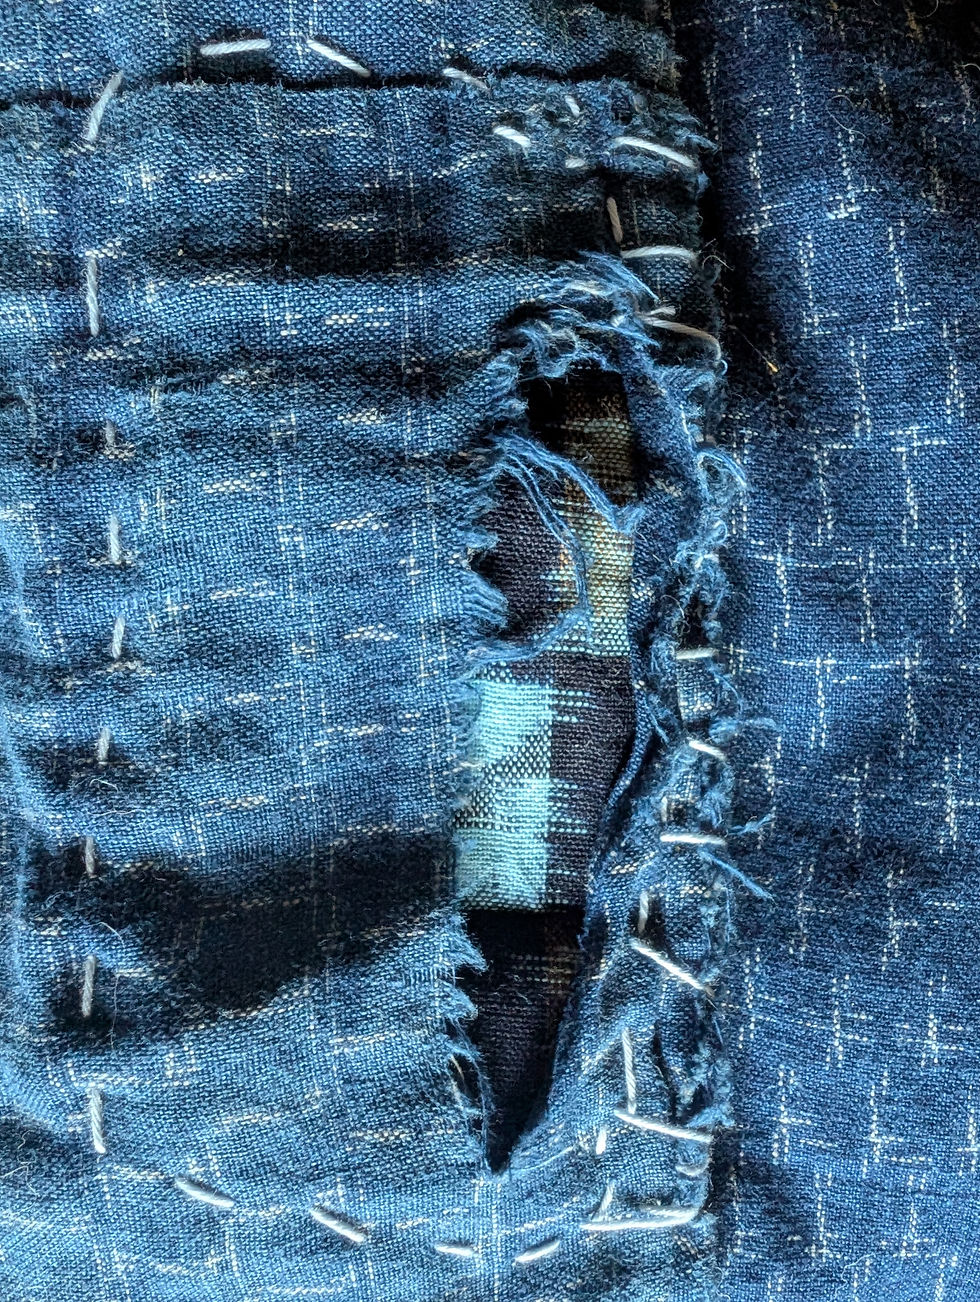
My technique: I use contrasting thread to create rugged borders around old repairs, then gradually extend patterns outward. This integration makes everything look equal parts planned and accumulated. It also harkens back to my punk rock roots - I used to run red thread borders roughly around the ripped necks of my favorite black band tees.
Managing Thickness Variations
Modern garments combine multiple fabric weights, challenging consistent sashiko-inspired visible mending. I've learned to adjust my approach as I move between sections and its often more about feel than about a hard and fast rule.
I keep multiple needles ready—different sizes for different fabric weights. When moving from denim waistband to lighter body fabric, I may switch needles mid-repair. This maintains consistent mending stitches across varying thicknesses.
For extreme thickness variations, I might modify my visible mending patterns. Tighter stitches through thick sections, longer stitches through thin areas. This adaptation maintains visual consistency while accommodating structural differences. It also keeps my mind engaged in the process.
Preventing Stitch Distortion
I've learned (and am always still learning!) that proper tension makes all the difference between professional-looking sashiko mending and puckered-up disasters. My method: after every few stitches, I gently stretch the fabric flat and adjust thread tension.
For long lines of mending stitches, I work in sections rather than attempting continuous runs. This prevents accumulated tension problems and allows for adjustments. I complete 10-15 stitches, check tension, then continue. My favorite number is 12, but I don't always get there. And that's okay.
I don't always test my approach on fabric scraps, but its a tip you may find useful if you're feeling less than confident about the end-results. A practice run reveals potential problems before you commit to the actual garment. These test pieces can save you from countless mistakes. Or, just dive in and learn from your mistakes as you go! Its all up to you and your level of comfort with imperfection.
Frequently Asked Questions
Is sashiko visible mending, or are they different techniques?
Short Answer: Sashiko is a specific Japanese stitching tradition that can be used for visible mending, but visible mending encompasses many traditional and modern techniques beyond sashiko.
When I use traditional sashiko patterns for repairs, I'm applying one specific technique within the broader visible mending movement.
Think of it this way: sashiko provides beautiful, functional patterns that work wonderfully for visible mending, but visible mending also includes darning, patching, embroidery, and other techniques from various cultures and individuals. I often combine sashiko patterns with other mending methods in single repairs. This flexibility—using sashiko mending where it serves the repair best while incorporating other techniques as needed—gives me more options for solving repair challenges and expressing myself.
Can visible mending work on children's clothes that need to withstand heavy wear?
Short Answer: Yes! I've found children's clothes ideal for creative visible mending patterns that kids actually love (and look adorable in).
Children's clothes benefit tremendously from sashiko visible mending, both practically and educationally. Use extra-strong reinforcement in high-wear areas, and try adding decorative patches preemptively to new garments. Kids love choosing thread colors for their repairs.
I've learned to make mending stitches slightly looser on my own clothes to accommodate movement and that same concept still applies to growing children. The key is using strong thread and reinforcing beyond the immediate damage area, as children's wear patterns are predictably messy and aggressive.
How do I build a mending routine when life is already overwhelming?
Short Answer: I started with ten-minute sessions during coffee or beer time and built from there. I treat sashiko mending as meditation rather than obligation.
My breakthrough came when I stopped seeing visible mending as another task (like Grandma's rainy day embroidery projects) and started viewing it as active relaxation. I keep one simple project in my living room and add a few mending stitches while sitting through a virtual meeting or waiting for dinner to cook. No pressure, no timeline. This gentle approach removed the overwhelm and let mending become a stress-relief tool.
I suggest starting with one small repair—maybe simple sashiko designs on a pocket corner—and building from that success.
What about professional or formal wear—can visible mending patterns really work there?
Short Answer: Absolutely! Subtle sashiko mending on professional wear often receives compliments rather than criticism, especially in Japan where it is seen as a nod to traditional craft.
Professional visible mending focuses on tonal repairs that enhance rather than casualize formal garments. Use matching or barely contrasting threads, placing sashiko designs along existing construction lines. On a navy blazer, I might use midnight blue thread in simple grid patterns that read as textural interest rather than obvious repairs.
Many high-end designers now incorporate visible mending aesthetics into formal wear, making thoughtful repairs increasingly acceptable in professional settings. The key is restraint—elegant mending stitches that suggest intention rather than accident.
How do I develop my own style rather than copying others' visible mending patterns?
Short Answer: I found my style by mending consistently and noticing what brought me satisfaction. Trust your hands and preferences over trends.
Your visible mending style emerges through practice. I started first as a teenager with rough stitches and safety pins, and later by copying traditional sashiko patterns exactly, then gradually adapted them to my preferences. Now I have signature elements, like my tendency toward diagonal lines and ovoid patches, my preference for red thread accents, my habit of extending patterns beyond repair areas.
Document your work to identify what you repeatedly choose. Your authentic style might be minimalist or maximalist, geometric or organic. I've learned that the most satisfying visible mending patterns are the ones that feel natural to create, not the ones that photograph best.
Key Takeaways
Action Items:
Assess your wardrobe using my framework to identify items that would benefit from preventive mending
Create a simple kit with your favorite needles, snips, and threads that complement your existing wardrobe palette
Schedule your first regular mending session; I suggest starting with just 15 minutes weekly
Bottom Line: Visible mending with sashiko-inspired techniques transforms necessary clothing repairs into opportunities for creative expression, mindful practice, and sustainable living, creating garments that tell your unique story through every stitch.
Next Steps: Ready to deepen your practice? Explore the cultural foundations in our guide to Japanese boro and sashiko traditions. Mending is about keeping beloved garments alive and functional - across time and cultures.
At Boro Living, I believe every stitch is a small act of rebellion against throwaway culture and a celebration of the stories our clothes tell. Your visible mending journey starts with a single stitch—let's make it count.
